


Making Garden Anthotypes
Creating anthotypes is a novel way to record the season and the perfect summer craft — not to mention a welcome break from weeding and watering the garden. Think of it as a way to playfully capture and hold onto the sun beyond Labor Day. The process is easy and nontoxic, a great project to do with children, although you and they will need a measure of patience.
The word anthotype comes from the Greek anthos (“flower”) and typos (“imprint”). If you’re familiar with sun prints, using photo sensitive paper to capture the silhouette of a plant on a sunny day, you’ll recognize the process. Although, in this process instead of using lightroom chemicals, we’ll use chlorophyll to create a light sensitive emulsion.
While you can use all kinds of petals, leaves or berries to create a plant-based emulsion, spinach is easy to source from the garden (or the grocery store) and relatively quick to develop an image when exposed to sunlight.


In addition to spinach, you’ll need a blender, a fine strainer, cheesecloth, a glass jar, a foam brush, watercolor paper, and a sheet of glass, like that from a picture frame. A dash of vinegar (optional) will brighten the color and help preserve your plant dye for a few days in the refrigerator in case you decide to extend your efforts beyond one day.
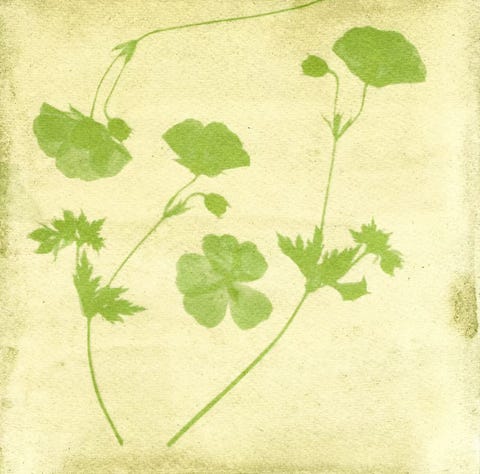
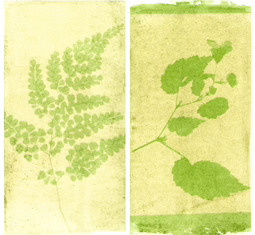
You’ll also need to snip of few plant sprigs from the garden; I had the best result working with a fern frond although a stem of pressed geranium flowers from last summer also produced an excellent print. I experimented with using fresh flowers, however pressing dimensional stems and petals under glass resulted in an image that was less sharp. Don’t get too precious with the process, think of it as play.
To begin, reduce spinach leaves to a fine slurry in a blender. As anyone who has cooked a mountain of spinach down to a shadow of its original volume can attest, the greens are mostly made up of water and will easily liquify on their own. Transfer the mixture to a piece of cheesecloth held in a fine strainer and squeeze the resulting bright green juice into a glass measuring cup or bowl. Starting with eight ounces of dry spinach I was able to extract about a half a cup of plant dye. If using, now is the time to add a half teaspoon of vinegar to the spinach juice.
Working in a dim room out of direct sun, use your foam brush to paint a light coating of the spinach liquid onto the surface of the watercolor paper and allow to dry. You can proceed after one coat of emulsion or, for higher contrast in your finished print, apply a second coat and allow it to dry. I suggest prepping several sheets of watercolor paper so you’ll have multiple opportunities to experiment — remember, this is play.
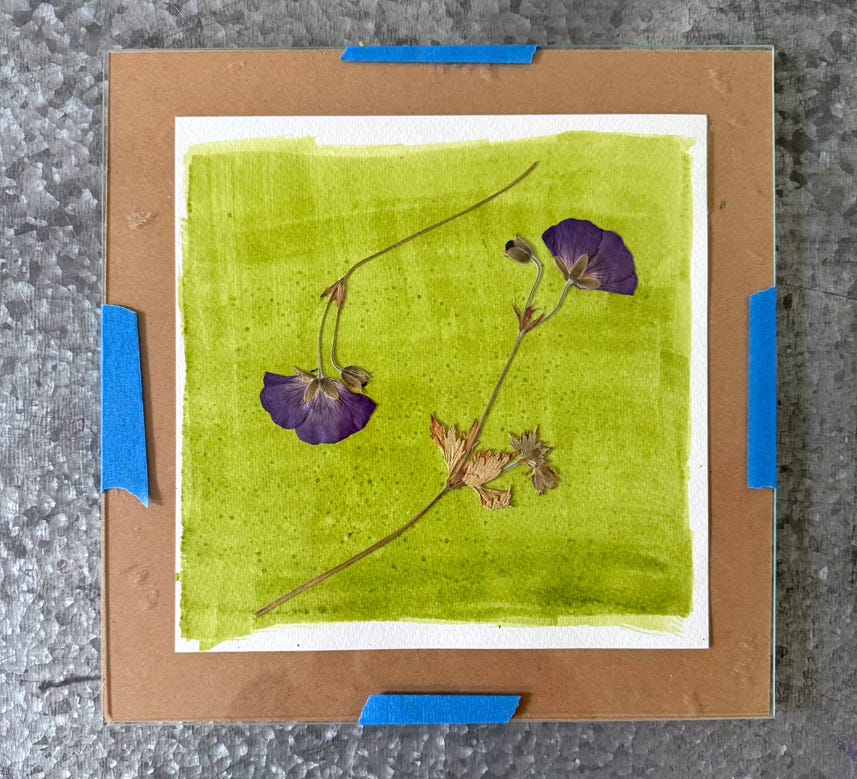
Now the fun part — sandwich your botanical between the thoroughly dry watercolor paper and a sheet of glass placed on top of a sturdy base that can be moved around; tape the sides of the glass to keep the paper and the botanical from shifting. Place your project on a flat surface where it will get full sun exposure for at least 3 to 4 hours. You may need to move your developing print to follow the sun throughout the day, that’s when you’ll be glad that everything is secured, as any movement, of your paper or the botanical, will blur the finished image.
As the hours pass, you’ll notice how the color of the exposed watercolor paper not covered by the botanical lightens as the sun bleaches the pigment. The longer you expose the print the higher contrast you’ll achieve in your final image. When you’re satisfied with results, remove tape, glass and the botanical to reveal your finished print.
Like summer itself, anthotypes are ephemeral. The image will gradually fade over time, more quickly when exposed to direct light. For a more lasting image, you can scan your finished anthotype.
This story first appeared in The Seattle Times.